These are the SMS settings for the plugin.
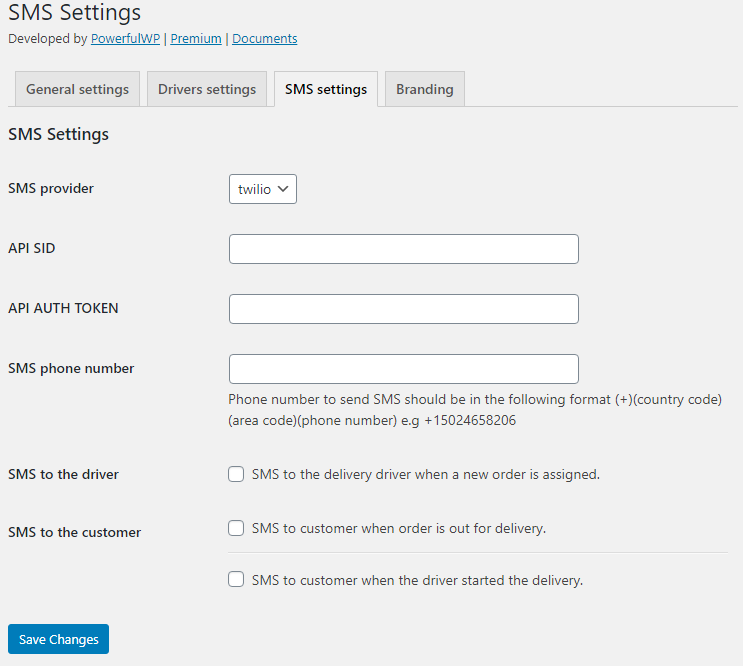
SMS provider
To send SMS, you need to add your Twilio API SID, API AUTH TOKEN
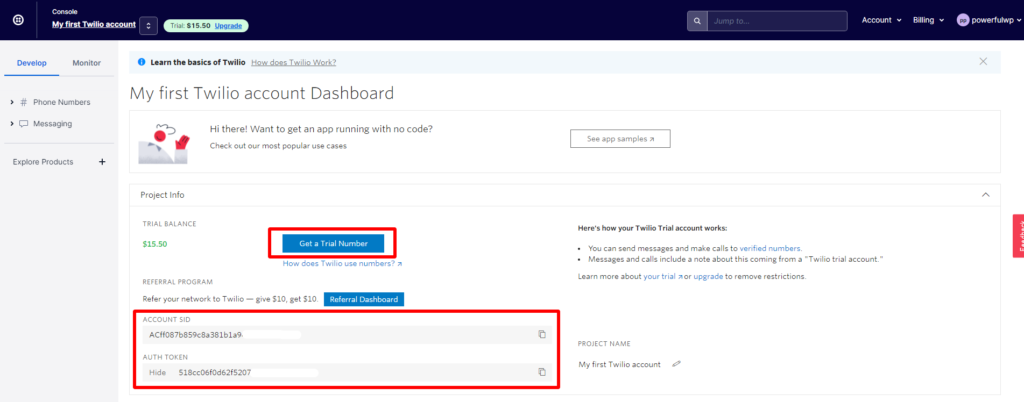
To create a Twilio account, click on the following link: https://www.twilio.com/try-twilio
- Fill out the form, click the submit button, and complete the email verification steps.
- Go to the Twilio console. You can get a trial phone number, account sid, and auth token on this page.
- Set it on the plugin SMS settings on the admin panel.
API SID
Get the API SID from your Twilio account.
API AUTH TOKEN
Get the API AUTH TOKEN from your Twilio account.
SMS phone number
SMS phone number is the phone number to send SMS. It should be in the following format (+)(country code)(area code)(phone number), e.g., +15024658206
The phone number must be registered with Twilio to send SMS.
If you are on the Twilio trial plan, you must use the phone number they provided to you.
SMS to driver
This option lets you send SMS to the delivery driver when a new order is assigned.
SMS to customer
SMS to customer when order is out for delivery.
SMS to customer when the driver started the delivery.
Each SMS has a default template, and you can update the template by writing your text and using the SMS shortcut tags.
Please note that each SMS should be no longer than 160 characters total.
When using Shortcuts in the SMS templates, please note that the transformed text characters are calculated, not shortcut characters.
For example, [tracking_url] is changing to http://www.domain.com/tracking