This document aims to guide you through the process of picking order items in WooCommerce using the Order Picking for WooCommerce plugin. Here, we’ll walk you through the step-by-step procedures to simplify your order fulfillment process, ensuring accuracy and efficiency in handling your customers’ orders.
Steps to Pick Order Items
Accessing the Plugin Menu
To start picking an order’s items using the Order Picking for WooCommerce plugin, first access the plugin menu from your WordPress dashboard. This is located on the admin panel. Click on the ‘Awaiting Fulfillment’ link to view all orders currently marked as ‘Awaiting Fulfillment’.
Viewing Order Picking Status
On the ‘Awaiting Fulfillment’ screen, you can view the order picking status for each order.
Choosing Your Display Method
This screen offers three distinct buttons that allow you to choose your preferred method of viewing your orders. These options include ‘Fulfillment by Order’, ‘Fulfillment by Product’, and ‘Fulfillment by Category’.
Fulfillment by Order
Choosing ‘Fulfillment by Order’ will allow you to view the details of each order as well as the items that need to be picked.
Fulfillment by Product

The ‘Fulfillment by Product’ view groups all orders based on the products they contain. This is particularly useful if you are picking items from the same location. For each product, you’ll see the total quantity needed across all orders. After picking the items, you can mark them as picked or specify any shortage.
Fulfillment by Category
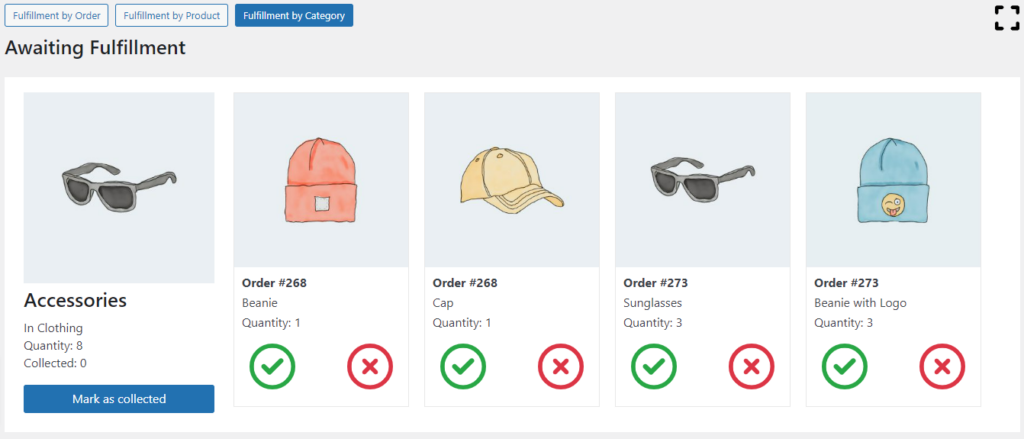
The ‘Fulfillment by Category’ view categorizes all orders based on the product categories. This is especially beneficial if your warehouse or store is arranged by product categories. In this view, you can go to each category, pick all items needed from that category, and mark them as picked or specify any shortage.
Picking Items
Within each item box, there are two icons, one for successful picking and another for failed picking. Click on the ‘Success’ icon once you’ve successfully picked the item. If you couldn’t collect the full quantity of an item, click on the ‘Fail’ icon. A form will appear asking you to input the quantity you managed to collect. Click ‘Send’ to submit this information.
Marking an Order as Fulfilled, Unfulfilled, or Partially Fulfilled
Once you’ve finished picking all the items for an order, you have several options depending on the order’s fulfillment status:
Fulfilled: If all items have been successfully picked, click on the ‘Mark as Fulfilled’ button. This changes the picking status from ‘Awaiting Fulfillment’ to ‘Fulfilled’, indicating that the order is ready for the next step in your fulfillment process. The order status will be updated according to the settings you’ve specified in the plugin’s settings.
Unfulfilled: If none of the items could be collected, you can leave the order as ‘Unfulfilled’. It will stay in the ‘Awaiting Fulfillment’ status. The order status will be updated according to the settings you’ve configured in the plugin’s settings.
Partially Fulfilled: If you managed to pick some but not all items, the order will be ‘Partially Fulfilled’. After recording the items you managed to collect (as mentioned in the ‘Picking Items’ section), the system will update the order status accordingly, based on the settings you’ve defined in the plugin’s settings.
Canceling Fulfillment
If you need to cancel the fulfillment for any reason, simply click on the ‘Cancel Fulfillment’ button.
By following these steps, you can efficiently manage the order picking process using the Order Picking for WooCommerce plugin, ultimately reducing errors and increasing efficiency in your order fulfillment workflow.